Setting Up Your First Machine Learning Project with DAGsHub
Written on
Introduction to DAGsHub
This guide will demonstrate how to initiate a Machine Learning project using DAGsHub, a platform tailored for enhancing collaboration on Data Science projects that involve data versioning and model development.
In this article, we will explore:
- Challenges associated with traditional Git and DVC configurations for Machine Learning projects and their limitations.
- An introduction to DAGsHub and how it addresses these issues.
- A step-by-step guide to setting up your first project using DAGsHub and its storage capabilities.
Challenges with Conventional Git and DVC Configurations
Collaboration in Machine Learning projects often relies on Git, a practice borrowed from software engineering. However, Machine Learning projects differ significantly because they frequently involve large data files that require regular updates, which Git struggles to manage effectively.
Though many Machine Learning practitioners have managed to adapt Git for their needs, it was never the ideal solution. As a workaround, some have turned to DVC (Data Version Control), which still utilizes Git but stores data files in remote cloud systems like S3, GDrive, or Azure.
While this approach simplifies collaboration on large data projects, it still necessitates a complex setup to integrate external storage with DVC.
What is DAGsHub and DAGsHub Storage?
DAGsHub is a free tool designed for Machine Learning projects that eliminates the aforementioned problems. Built on Git and DVC, it facilitates easy data and model versioning and allows for tracking of experiments. The recent addition of DAGsHub Storage further streamlines the setup of Machine Learning projects, removing the need for extensive configuration.
This means you no longer have to invest in cloud storage options such as AWS, GCS, Azure, or GDrive for managing large datasets, nor will you face the difficulties of setting them up with DVC. With DAGsHub Storage, you can conveniently access your code, data, models, and experiments all in one location.
Exciting, right? In the following section, I will guide you through the process of establishing a machine learning project using DAGsHub and DAGsHub Storage in a few simple steps.
Setting Up Your First Project with DAGsHub
To begin, the first step is to create a DAGsHub account. You can do so by following this link.
Once registered, you can log in to your DAGsHub space, where you will create a new repository.

Fill in the repository details, including a name and brief description, while leaving the other settings at their defaults. After creating the repository, you can initialize the project from the command line:
mkdir my_first_dags_hub_project
cd my_first_dags_hub_project
git init
Your project structure isn't established yet, so let's create directories to store data and outputs:
mkdir data
mkdir outputs
We will utilize example data from a machine learning project in the official DAGsHub tutorial. Download the project requirements from requirements.txt and place it in your main directory. Then, initialize a virtual environment using the following commands:
python3 -m venv .venv
echo .venv/ >> .gitignore
echo __pycache__/ >> .gitignore
source .venv/bin/activate
Next, install the requirements in your new virtual environment:
pip install -r requirements.txt
You're now ready to add training data to the previously created data folder:
echo /data/ >> .gitignore
echo /outputs/ >> .gitignore
The commands above will download the data for your project and ensure that data and output files are excluded from Git (.gitignore entries).
Finally, commit your changes to Git:
git add .
git commit -m "Initialized my first DAGs Hub project"
git push -u origin master
At this point, your repository should appear like this:
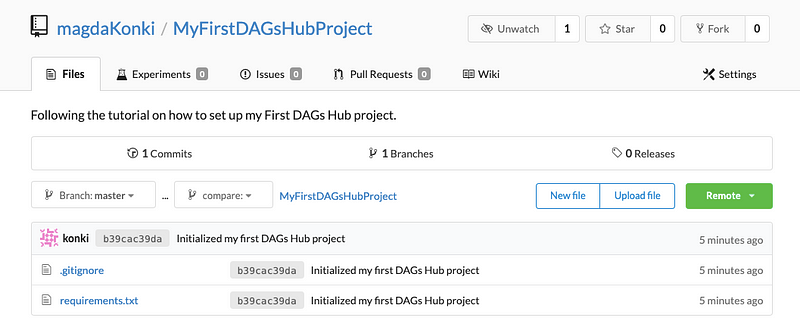
You will see only the .gitignore file and the requirements. Let's manage the data folders using DVC. First, add a training file (main.py) to your project directory and then to the remote repository:
git add main.py
git commit -m "Adding training file"
git push -u origin master
Your project should now look like this:
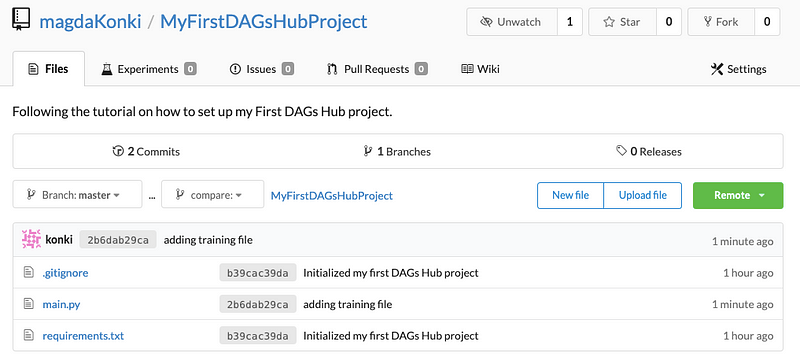
This main.py file can either split the data into training and testing sets or train the machine learning models. Let's start by splitting the data (ensure your virtual environment is activated):
python main.py split
Then, proceed to train a model:
python main.py train
You should see output similar to this:

After splitting, new zip files will appear in the data folder, and the training process will generate .joblib files in the outputs folder. All of these need to be tracked by DVC, so initialize it by running:
dvc init
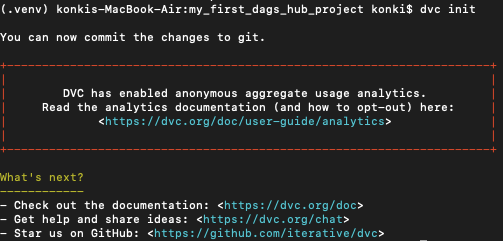
Now add the data and outputs for DVC tracking:
dvc add data
dvc add outputs
Then, include the corresponding information in Git:
git add .dvc data.dvc outputs.dvc
git commit -m "Added data and outputs to DVC"
Next, set up DAGsHub Storage as your DVC remote using the following commands with your credentials:
dvc remote default origin --local
dvc remote modify origin --local user <DAGsHub_username>
dvc remote modify origin --local auth basic
dvc remote modify origin --local password <DAGsHub_password>
Finally, commit the setup changes to Git:
git add .dvc/config
git commit -m "Configured the DVC remote"
git push -u origin master
dvc push --all-commits
This process will result in all files being uploaded to DAGsHub Storage.
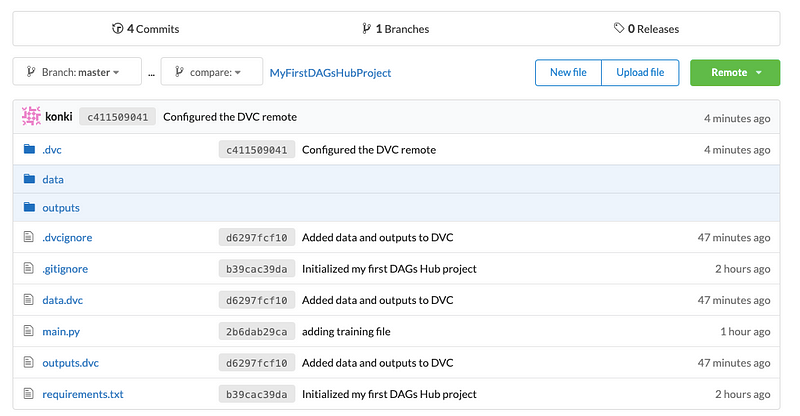
As illustrated, all components, code, data files, and models are versioned, stored, and accessible in one location. You've successfully established your first Data Science project using DAGsHub and its storage system!
You might be curious: where are the steps for configuring DAGsHub Storage? The reality is, there are no complex setup steps required—just a few lines of code. Your data and models are automatically stored by DAGsHub Storage without any intricate configuration, making it a preferable option compared to services offered by Amazon and Google.
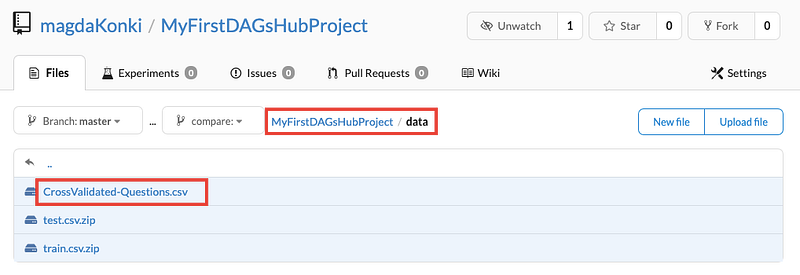
Additionally, the data stored in DAGsHub is easily viewable and searchable. To experience this feature, navigate to the data folder in your DAGsHub Storage project view and inspect the CrossValidated-Questions.csv file.
The CrossValidated-Questions.csv file that we utilized for training the machine learning algorithm can be accessed effortlessly within DAGsHub Storage, resembling a searchable pandas DataFrame.
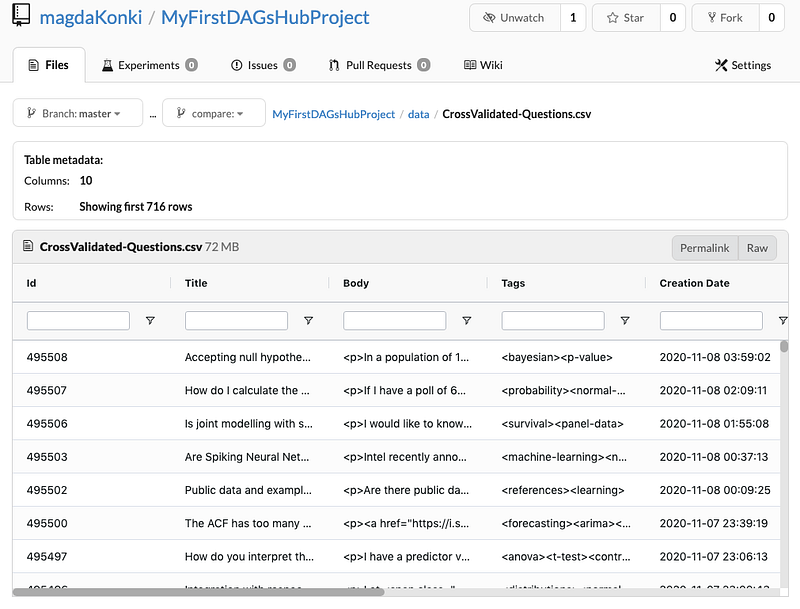
DAGsHub Storage comes equipped with many productive features that can significantly enhance your machine learning project. It's also an excellent collaboration tool, enabling your entire team to work together seamlessly.
Summary
In this article, you have learned how to set up your first project using DAGsHub and DAGsHub Storage, which simplifies the process for Machine Learning projects. This innovative solution offers enhanced collaboration compared to traditional setups involving Git, DVC, and other remote storage providers.
I hope you found this information helpful, and happy coding!
Recommended Reading
Top 9 Jupyter Notebook Extensions
Enhance notebook functionality and boost your productivity.
Introduction to Python f-strings
Learn why you should start using them today.
Top 8 Magic Commands in Jupyter Notebook
Discover the most useful commands to increase your productivity.