Setting Up Client VPN with Meraki Router for Remote Access
Written on
Chapter 1: Introduction to Client VPN Setup
If you’ve faced challenges in establishing a VPN for remote employees to access office resources, Meraki offers a solution. Implementing a client VPN can be a hassle for smaller companies, but switching to a Meraki Z series or MX series can alleviate these concerns effectively.
This tutorial assumes you have already set up your Meraki device and logged into the Meraki Cloud portal.
Section 1.1: Activating the Client VPN
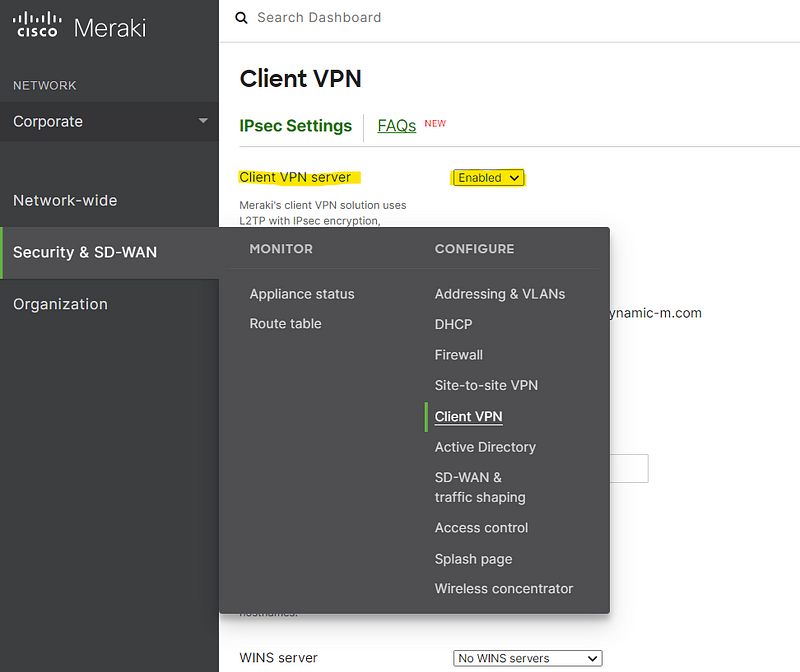
To begin, navigate to Security & SD-WAN > Client VPN in the Meraki Cloud portal. Enable the Client VPN Server.
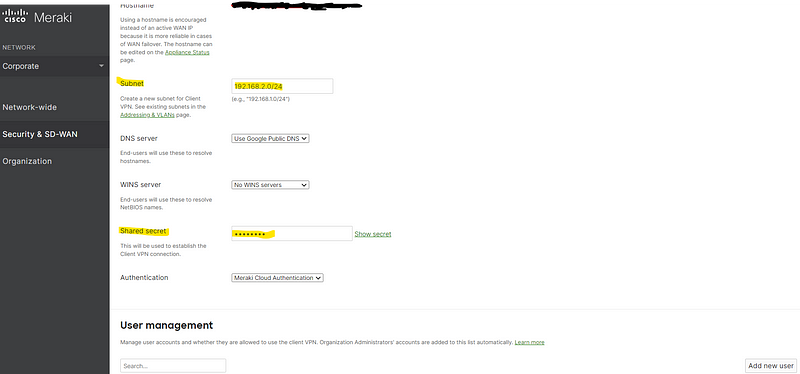
Next, you will need to specify the IP subnet in CIDR format. For example, if your network uses the range 192.168.1.x, you can select the next available IP, as illustrated below. I have opted for Google's DNS for this setup, so don't forget to set a Shared Secret.
Meraki provides various authentication methods, including Meraki, RADIUS, and Active Directory. In my case, I chose to create users directly in the Meraki Cloud since the team is small. However, you can explore the other options if necessary, though they are beyond the scope of this quick-start guide.
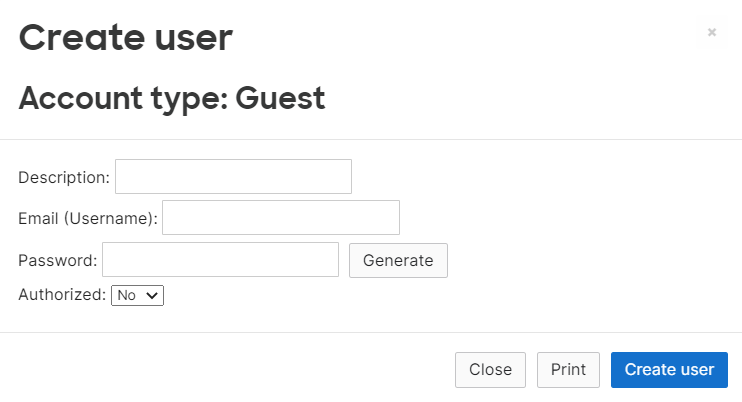
To add a new user, click on "Add new user," provide a name, email address, and password, then authorize the user.
With this, you've completed the server-side setup for the Client VPN.
Section 1.2: Configuring the Windows Client
Now that your Meraki Cloud is ready, it’s time to set up the client workstation to connect to it. Meraki devices can support connections from various platforms, including Windows, Mac, iOS, and Android.
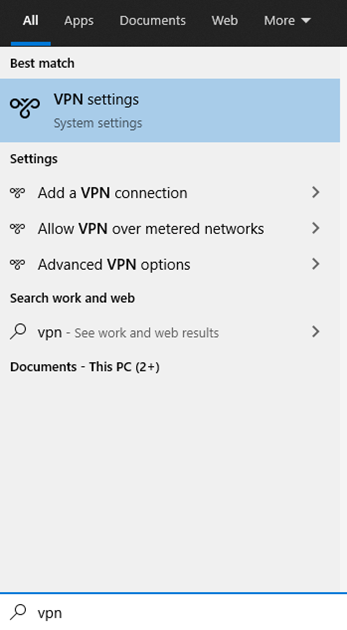
Start by clicking on "Start" and typing VPN, then select "Add a VPN Connection."
After that, fill out the form: set VPN Provider to Windows (built-in). You can name the connection after your company or any other description. The server name should be the public IP of your router, a domain A record directed at the router, or the hostname from the Meraki Cloud.
Choose L2TP/IPsec with a pre-shared key as your VPN Type, and input the shared secret along with the username and password you established in the Meraki Cloud.
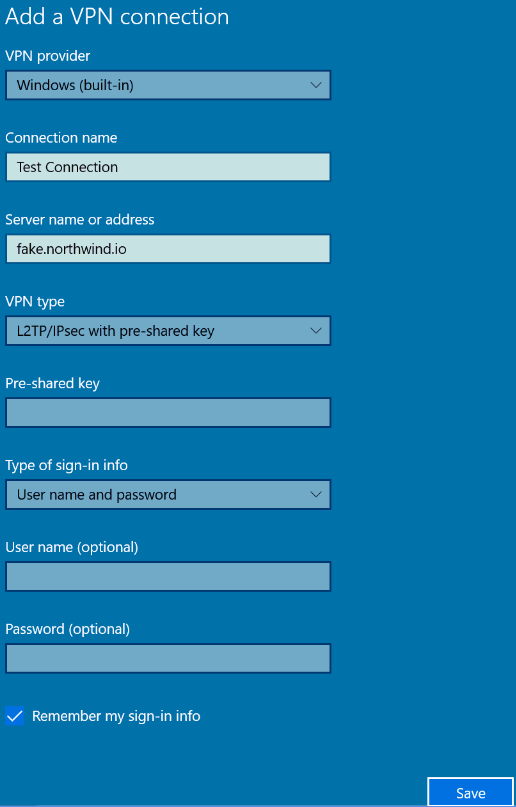
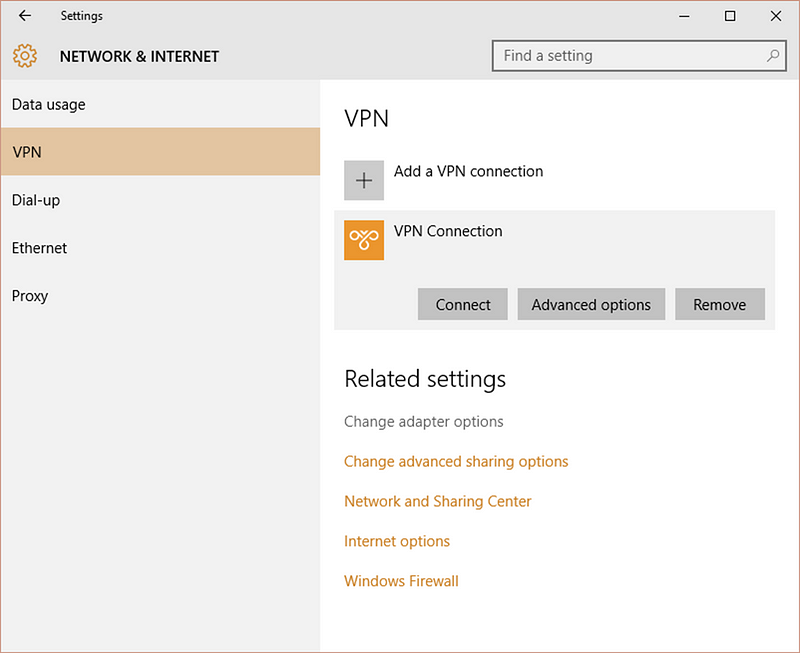
Once saved, click on "Change Adapter Options."
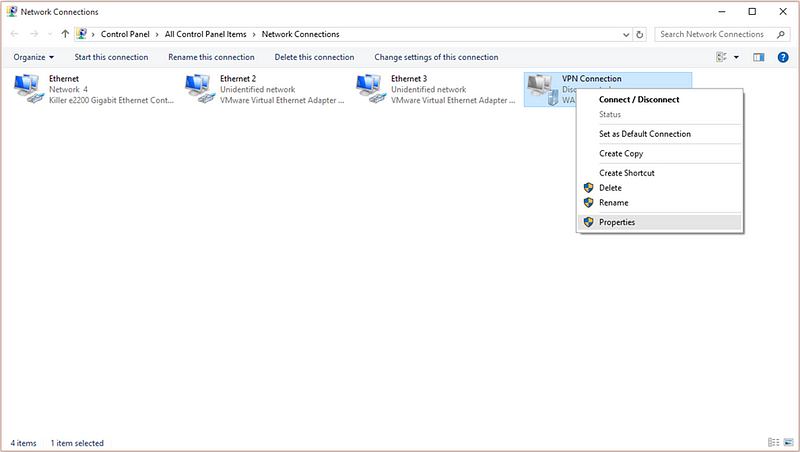
Right-click on your newly created VPN Connection and select Properties.
In the Security tab, select "Require encryption (disconnect if server declines)" for Data encryption. Under Authentication, check "Unencrypted password (PAP)" and uncheck all other options, including Microsoft CHAP Version 2 if it’s selected.
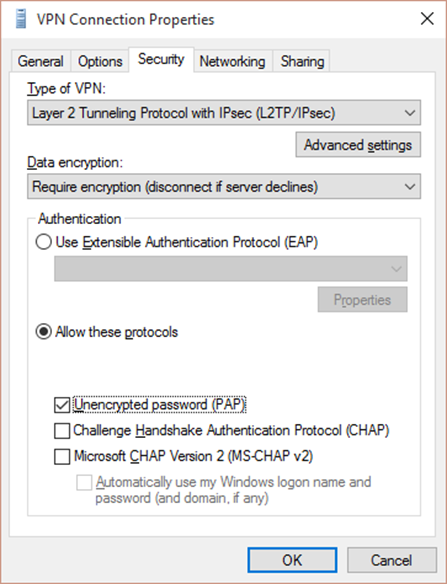
Click "Advanced settings," and in the Advanced Properties dialog, select "Use preshared key for authentication," entering the pre-shared key created in Security appliance > Configure > Client VPN settings.
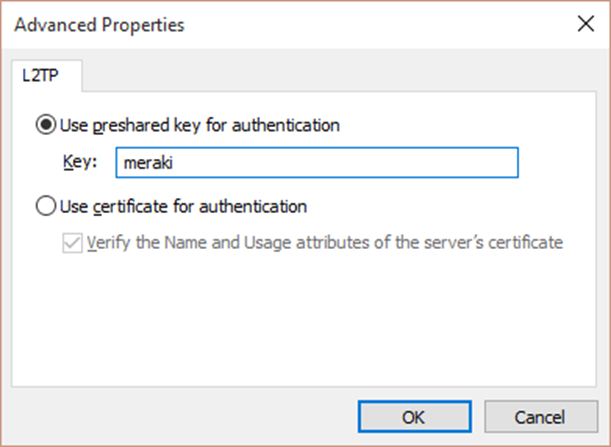
Click OK, then right-click your VPN icon and choose "Create Shortcut" to place it on your desktop.
Congratulations! You can now double-click the VPN shortcut on your desktop to connect to your Meraki Client VPN.
Chapter 2: Important Considerations for Windows 10 and 11
This video provides a detailed walkthrough on configuring the Client VPN in the Cisco Meraki Security Appliance MX.
Here, you can find a tutorial on setting up the Cisco Meraki Client VPN specifically for Windows 10.
As a quick note, in early January 2022, an update from Microsoft affected some VPN users. There have been several out-of-band updates and temporary fixes while a permanent solution is being integrated into the main Windows Update. More details can be found on Meraki’s community site.
I hope this brief guide assists you in establishing a VPN. It proved invaluable for my IT colleagues, helping small office clients remain connected during the pandemic for seamless remote work.
If you found this guide helpful, please feel free to leave a clap and a comment below.