Enhancing AWS WebSocket Security with Lambda Authorizers
Written on
Chapter 1: Introduction to WebSocket Security
In the previous article, we explored creating a WebSocket API on AWS, enabling us to establish a working API for message exchanges. However, security is a crucial aspect that we now need to address.
As we delve into the world of WebSockets, the importance of safeguarding our API from potential threats becomes clear. We certainly wouldn't want unauthorized individuals to access our API and launch attacks, such as DDoS or injection threats.
In this post, we will enhance our earlier setup by incorporating a Lambda authorizer, ensuring that only authenticated users can connect to our system.
Understanding WebSocket Authentication
You might wonder, “Why is this topic necessary? I can easily add a Lambda authorizer to any API.” While that is true, there are specific nuances regarding WebSockets that are essential to grasp. Most JavaScript libraries for front-end applications do not typically support standard Authorization headers.
When establishing a connection, the WebSocket API only recognizes the Sec-WebSocket-Protocol header. Tools like Postman allow additional headers during connection attempts, which is beneficial, but you may encounter limitations when implementing the code on your application's front end.
To navigate this limitation while maintaining secure connections, we have two primary methods to consider:
- Sending delimited values via the Sec-WebSocket-Protocol header
- Including the authentication token as a query string parameter named access_token
Each method has its advantages and drawbacks, and the choice ultimately depends on your specific needs. In our AWS implementation, both options are supported. However, I recommend using the query string parameter method for its simplicity and clarity, avoiding complications with the Sec-WebSocket-Protocol header.
Instead of utilizing the standard Authorization header for new connections, we will send a query string parameter called access_token, which contains our JWT.
It's also important to note that authentication is only required during the $connect event. All subsequent interactions can utilize the established connection, making the process straightforward!
If you followed the initial part of this series, you have already deployed a basic WebSocket API in your AWS account, which can manage connections and subscriptions. Today, we will work with an updated branch of that repository to introduce enhancements.
If you are unsure how to check out non-main branches in a repository, you can execute the following commands in your VS Code terminal:
git fetch
git checkout part-two
Once you have the source code locally, you can deploy it as you did previously, using the sam deploy command. Before doing so, remember to update the samconfig.toml file.
In our Lambda authorizer, we will verify that the provided JWT (authentication token) originates from a trusted source. This involves checking that the JWT is signed with our secret key. Choose a secret key that you can remember, and ensure that it remains confidential, especially in a production environment.
Using the sam deploy --guided command is advisable to set the parameters for this stack anew. Once you've completed that, feel free to deploy!
What Did We Just Deploy?
First, I appreciate your trust in this process! You have deployed the same foundational setup as before, now augmented with several new features:
- A new Lambda authorizer
- An updated $connect Lambda that stores user information
- A test Lambda that generates a JWT based on the secret you provided during deployment
- Integration with Secrets Manager to securely store your JWT secret
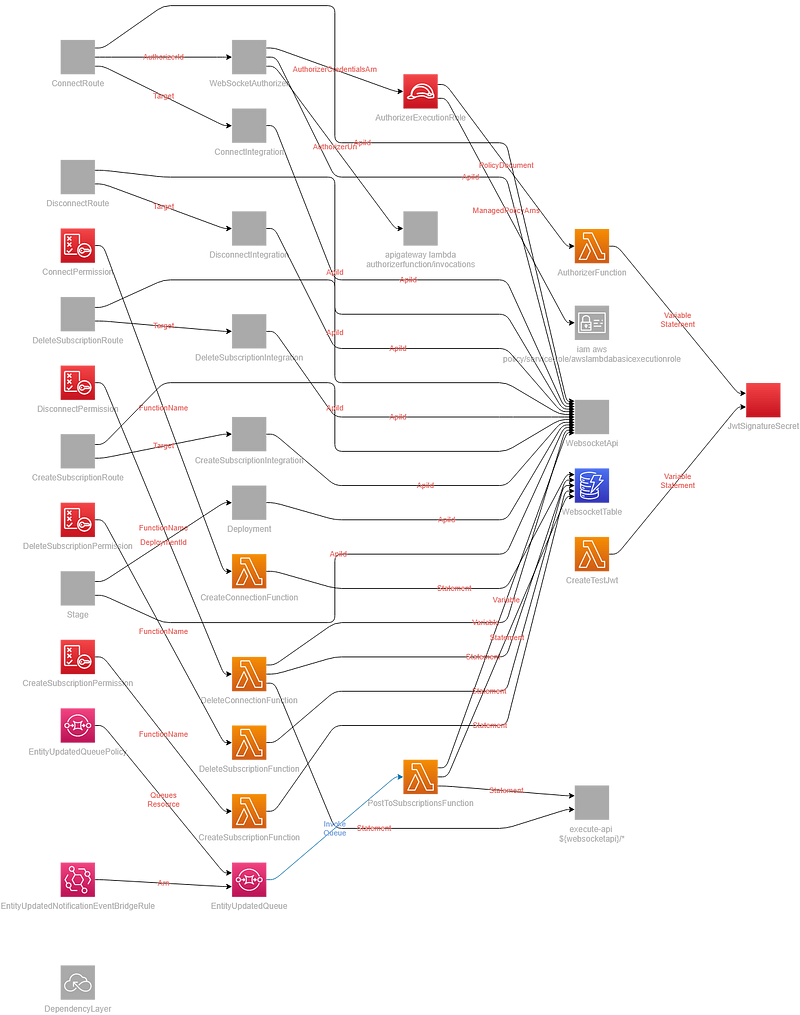
The repository includes a comprehensive infrastructure diagram generated from the template.yaml file. If you haven't done so already, I highly recommend incorporating generated diagrams into your workflow. They are easy to create and immensely valuable. Below is the complete set of resources deployed on AWS to establish a secure WebSocket API.

Connecting to a Secure WebSocket
With everything successfully deployed, it's time to connect to our WebSocket! First, we must ensure that the connection is secure. Let's connect in the same manner as we did in the first part of this series:
- Open your desktop application.
- Select New -> WebSocket Request.
- Enter the route from the output of your SAM deployment (use the WebsocketUri output value) in the address field.
- Click on the Headers tab and add the Sec-WebSocket-Protocol header with the value websocket.
- Hit Connect.
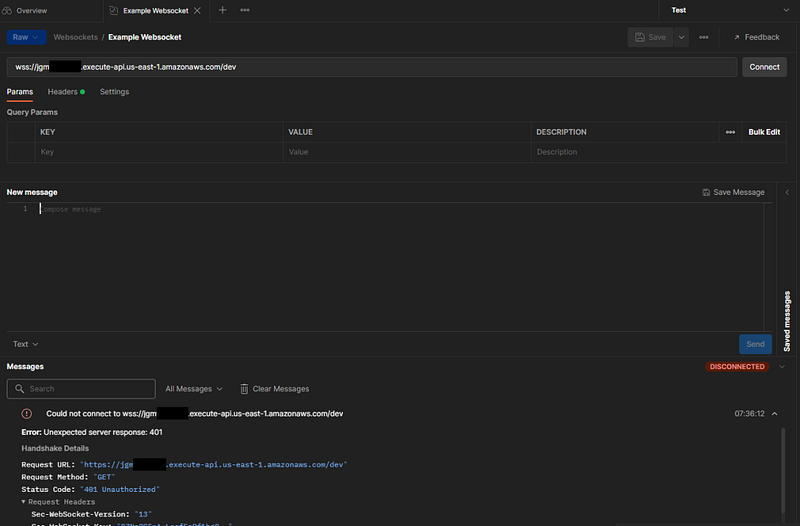
If everything goes correctly, we should receive a 401 error due to the absence of an authentication token.

Now, let's obtain a token and establish our connection:
aws lambda invoke --function-name CreateTestJwt response.json
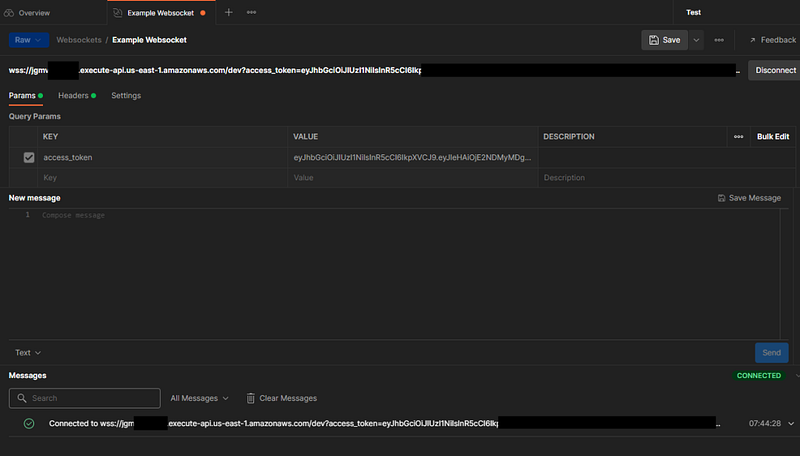
Open the generated response.json file and copy the value from the authToken property. In Postman, append a query string parameter called access_token to the URL and paste in the authToken value, then hit Connect.

Now that we are connected, we can freely send and receive messages through the WebSocket without needing further authentication.
What’s Next?
With our WebSocket secured, we can now breathe a sigh of relief, knowing that malicious users cannot disrupt our system. The first step is to relax!
Furthermore, we can now send notifications on a user-specific basis. Lambda authorizers return a context object containing valuable data that you can use within your code. In our example authorizer, we've decoded the userId, firstName, lastName, and sub from the JWT and passed this information to the $connect function.
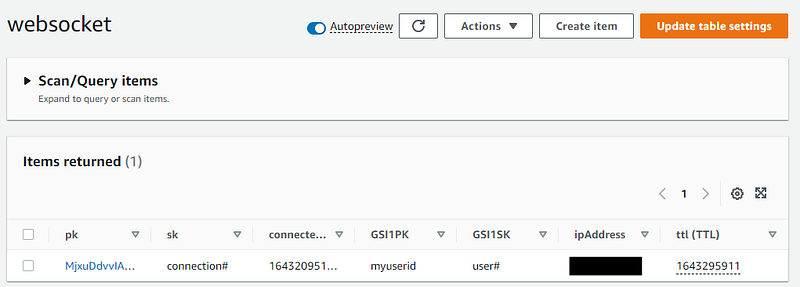
This data is stored within the connection record in DynamoDB, allowing us to send personalized push notifications when necessary.

The user ID is stored as GSI1PK, enabling us to retrieve connection details for users and send them notifications if needed. Although this functionality isn't implemented in this walkthrough, we will explore it in greater detail in future articles within this series.
Upcoming Topics
In this era of asynchronous programming, we’re diving deep into WebSockets. Future articles will cover documentation of WebSocket APIs using the Async API Spec, implementing user-based push notifications, and transitioning from synchronous to asynchronous endpoints seamlessly.
Feel free to experiment with the stack presented in this tutorial, familiarize yourself with the components, and make any desired modifications. Happy coding!
AWS API Gateway Websocket Tutorial With Lambda | COMPLETELY SERVERLESS!
This video guides you through creating a completely serverless WebSocket API using AWS API Gateway and Lambda.
Secure your API Gateway with Lambda Authorizer | Step by Step AWS Tutorial - YouTube
Learn how to implement a Lambda authorizer to secure your API Gateway, ensuring that only authenticated users can access your services.